- Home
- Adhaar Card
- Digilocker
DigiLocker Explained : Features, Use, Documents Upload & Download
- Personalized solutions
- Expert guidance
- Application assistance
- Credit score discussion
- Interest rate comparison


Last Updated: 12 May 2026
With the advancement of technology, everything from classes to office meetings and movies to big events, payments and transactions have been digitised. The trend accelerated specifically during COVID-19 and has been continuing since. DigiLocker is a tech that allows people to carry documents on the cloud. With DigiLocker, you don’t have to worry about losing documents or theft.
As a part of the paperless governance, the Government of India launched DigiLocker. If you are an Aadhaar Card holder, you can have a DigiLocker account and upload essential documents. Keep reading the blog to know what DigiLocker is and how it can benefit you.
What is DigiLocker?
DigiLocker is an application and online digital service offered by the Ministry of Electronics and Information Technology (MeitY), Government of India, under its Digital India initiative. The service allows every Aadhaar holder an account to the cloud to access valid certificates and documents, like vehicle registration, Passport, Driving License, Academic sheet, identity and address proofs, etc., in the digital format from the original issuers of those certificates.
Every account holder receives 1 GB of storage space on DigiLocker, where they can upload scanned copies of their documents. It eliminates the usage of physical documents as you can carry the e-copies of all the required documents on the DigiLocker mobile app. The digital copies of the docs are considered authentic on par with the original documents.
Government authorities or organisations registered with DigiLocker can access scanned copies of documents for verification. DigiLocker is safe and protects your documents.
What are the Features of DigiLocker?
As mentioned above, the app aims at building paperless governance. Besides, it’s packed with numerous features and offers the following benefits to both citizens and agencies:
- The app follows standard software development practices of uniform guidelines, coding standards, and reviews.
- DigiLocker app saves citizens’ accounts from unauthorised access by terminating the session automatically in case of extended inactivity.
- A citizen can access their important documents anytime and anywhere.
- Documents stored on DigiLocker are authentic and legally at par with the originals.
- Documents are exchanged digitally only with the citizens’ consent.
- Citizens receive faster service delivery, such as employment, health, education, financial inclusion, and government benefits.
- For agencies, DigiLocker minimises administrative overhead by reducing the use of paper and shortening the verification process.
What are the Main Objectives of DigiLocker?
The prime objective of DigiLocker involves the following:
- Reducing the use of physical documents
- Minimising administrative expenditures
- Rendering secure access to government-issued documents
- Offering authenticity of the electronic documents
- Making it easy for the residents to avail services without any hassle
How to Use DigiLocker App?
You can use the DigiLocker App to upload your essential documents and carry them anywhere you want. The app makes it easy to access them anytime and from any corner of the world. All you need is an active internet connection.
To use the app and enjoy the benefits, you must create an account on DigiLocker and upload all your essential documents such as ID, address proof, birth certificates, passports, etc.
How to Open a DigiLocker Account?
Opening an account with DigiLocker is easy. Follow the steps below:
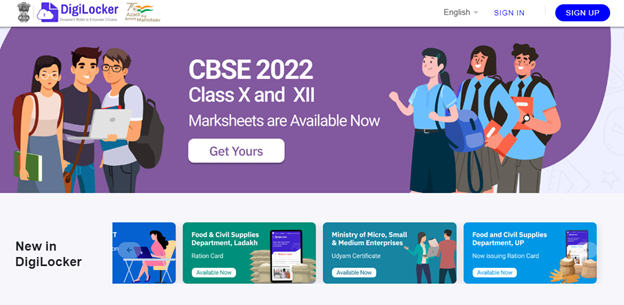
Step 1: Go to the DigiLocker website at digilocker.gov.in. Or you can download the mobile application from the Google Play/App store.
Create an account using your Aadhaar number. Ensure that your current mobile number is registered with your Aadhaar number.
Step 2: Click on ‘Sign Up’ at the top right corner of the page.
Step 4: A new page will appear where you must fill in your name, date of birth, gender, mobile number, email ID, and Aadhaar number. You must create a six-digit PIN as well.
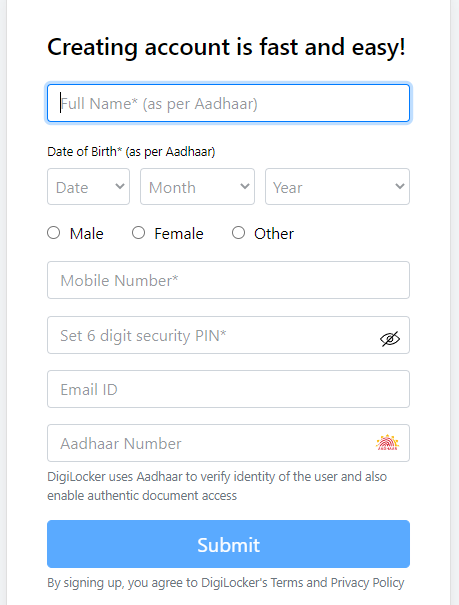
Step 5: Once you have entered your Aadhaar number, you will have to choose from two options — Fingerprint or One Time Password (OTP). You can choose either of them and click on ‘Submit’.
Step 6: Once you have completed the process, the application will ask the user to create a ‘Username’ and ‘Password’. Choose a preferred username and password for your DigiLocker account and click on the Sign-up tab. Once your account has been created successfully, DigiLocker’s ‘Dashboard’ screen will be displayed.
How to Upload Documents in DigiLocker?
Usually, users find trouble uploading their documents to DigiLocker, which is quite simple. We have listed below simple steps to upload documents in the DigiLocker application:
Step 1: Sign in to your DigiLocker account using your username and password. It will take you to the homepage of your DigiLocker account.
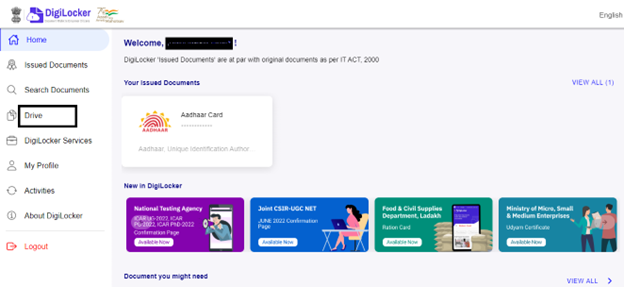
Step 2: If you are using DigiLocker’s website, click on the ‘Drive’ option available on the menu bar on the left-hand side of the page.
However, if you use the DigiLocker app on your phone, scroll down to the bottom of the page. You will find a section named – ‘Documents from Drive’. Click on it, and proceed with the same steps as the website.
Step 3: A new page named ‘DigiLocker Drive; will open. Click on the ‘Documents’ box under the ‘Folder’ section.
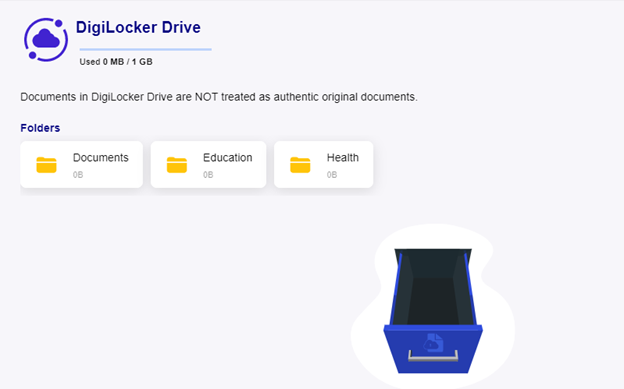
Step 4: A new page will appear. Click on ‘Upload Files’, select the documents you want to upload and click on open. Your documents will be uploaded to the website successfully.
Note: Documents uploaded through Drive are not considered original and authentic documents. However, you can use them at places where scanned documents are required.
How to Add Passport in DigiLocker?
Following are the steps to add a passport to your DigiLocker account:
Step 1: Ensure all the required documents are uploaded to your DigiLocker account before adding a passport.
Step 2: Visit the official portal of Passport Seva and fill in the details required.
Step 3: Proceed to the section where the documents must be uploaded.
Step 4: A new page with a self-declaration will appear in which the ‘Grant DigiLocker Access’ contains ‘Proof of Birth’. Click on it.
Step 5: You must log in to your DigiLocker account using your Aadhaar/mobile number and 6-digit PIN or your username and 6-digit PIN.
Step 6: The Passport Seva portal will now access your Digi account.
Step 7: A new page will open where to have to choose the ‘Fetch from DigiLocker’ option. Once you have opted for it, the screen will display the following text — ‘The document from DigiLocker has been uploaded successfully.’
Step 8: If the documents are missing on the DigiLocker account, it will display the message stating — ‘Selected document is not present in your DigiLocker Account. Documents can’t be Uploaded.’
Step 9: The website can also use some supporting documents from DigiLocker. Such documents can be acquired by clicking on ‘Fetch from DigiLocker’.
How to Add Voter ID in DigiLocker?
Currently, the Election Commission of India (ECI) doesn’t allow DigiLocker to access the voter ID of citizens. However, if you want, you can download EPIC (Election photo identity card) from the official portal of ECI and upload it to your DigiLocker account by following the abovementioned steps in the subhead — How to upload documents in DigiLocker accounts.
How to Add PAN Card in DigiLocker?
Adding a PAN card in DigiLocker is simple. Follow these simple steps:
Step 1: Go to the official website of DigiLocker or open the DigiLocker app on your phone and log in with your username and password.
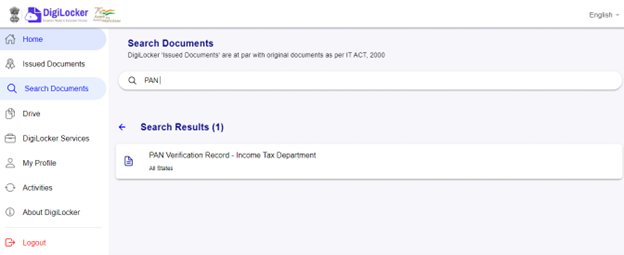
Step 2: The dashboard will appear. On the left-hand side of the page, click on the ‘Search Documents’ option.
Step 3: A new page will appear. Enter ‘PAN’ in the search field. The search result will display the ‘PAN Verification Record — Income Tax Department’ option. Click on it.
Step 4: You will be directed to a new page, where you have to enter details such as your name (as per Aadhaar), date of birth, Gender, PAN No., and name as in your PAN Card.
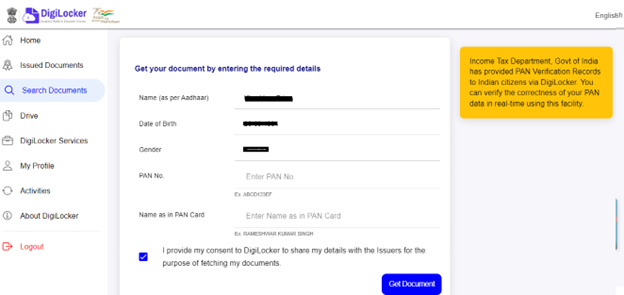
Then, check the box stating that you provide your consent to DigiLocker to share your details with the issuers.
Step 5: Once you have entered the details, click on the ‘Get Document’ box. The application will take a few seconds to fetch the document from the issuer. Once fetched, it will be automatically uploaded and taken to the ‘Issued Documents’ page, where you can see your PAN.
How to Add Pollution Certificate in DigiLocker?
If you drive/ride a vehicle that runs on fuel, you must have an Emission Certificate/Pollution under Control (PUC) Certificate. To upload them on DigiLocker, follow the steps below:
Step 1: Go to the official portal of ‘DigiLocker’ and sign in using your username and PIN or mobile number/Aadhaar number and six-digit PIN.
Step 2: You will receive an OTP on your registered mobile number. Enter it and proceed.
Step 3: Navigate to the left-hand side of the page on the menu bar and select ‘Issued Document’. Now, click on the ‘Check Partners Section’ to get started.
Step 4: Choose ‘Ministry of Road, Transport, and Highways, All States’ as Partner Name and ‘Document Type’ as ‘Emission Certificate’. You can also opt to put Partner Name as the name of the Transport Department in your state. For instance, if you have a driving license in Uttar Pradesh, you can Partner Name as ‘Department of Transport — Government of Uttar Pradesh’.
Step 5: Enter your PUC registration number and tap on the ‘Get Document’ button.
Step 6: DigiLocker will fetch data of the Emission Certificate and link it with your account.
Step 7: You will be automatically redirected to the ‘Issued Documents’ page. You can view it by clicking on it. It will be displayed on your screen. You can also download it by simply clicking on the download arrow. The download will be in pdf format.
How to Add Driving License in DigiLocker
To upload your Driving License (DL) to your DigiLocker account, follow the steps below:
Step 1: Visit the official portal of DigiLocker or simply open the DigiLocker app on your phone.
Step 2: Log in to the portal using your mobile/Aadhaar number and 6-digit PIN or username and PIN. Click on Sign in.
Step 3: You will receive an OTP on your registered mobile number. Enter it, and you will be taken to DigiLocker’s dashboard.
Step 4: In the section named ‘Document you might need, click on the box that says ‘Driving License.’

Step 5: You will now be taken to the Driving License page, where you must fill in your name, date of birth, and DL No.
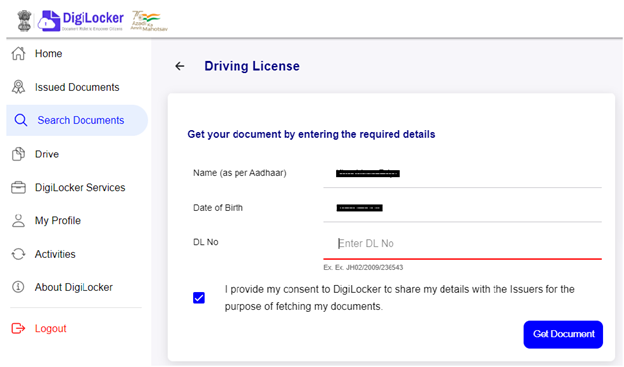
Step 6: Check the box that states that you offer your consent to DigiLocker for sharing your details and click on the ‘Get Document’ box.
Step 7: The application will fetch your Driving License data and take you to the ‘Issued Documents’ page. There you will find your DL. You can view and download it in pdf format.
How to Add Birth Certificate in DigiLocker?
Adding a Birth Certificate to DigiLocker requires a few steps as follows:
Step 1: Open the DigiLocker App on your phone or log in to the DigiLocker website.
Step 2: Scroll down to the section named ‘Documents from Drive’ and click on it. Website users can find the ‘Drive’ option on the left-hand side of the page. Click on it.
Step 3: A new page named ‘DigiLocker Drive; will open. Click on the ‘Documents’ box under the ‘Folder’ section.
Step 4: Click the ‘Upload’ button and choose the birth certificate you want to upload from your phone’s or computer’s storage.
Step 5: The document will be uploaded to your Digi Account. You can view it by visiting the drive, clicking on the document option, and tapping on the document uploaded.
How to Add Aadhaar Card in DigiLocker?
Since UIDAI is now a partner with DigiLocker, it has become easy to add Aadhaar to the portal. Following are the steps to upload an Aadhaar Card to a DigiLocker account:
Step 1: Navigate to the official website of the DigiLocker app and access the app on your phone.
Step 2: Log in to the portal using your mobile/Aadhaar number and 6-digit PIN or username and PIN. Click on Sign in.
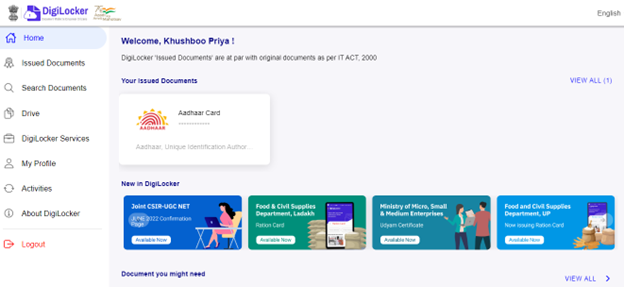
Step 3: You will be taken to the dashboard of your DigiLocker account. You will find a dialogue box displaying a message to get your e-Aadhaar. Tap on ‘Click here.’
Step 4: You will get One Time Password on your phone number linked to your Aadhaar card. Enter the OTP and tap on the ‘Verify OTP’ button.
Step 5: Once verified, it will fetch your Aadhaar data and take you to the ‘Issued Documents’ page, where you can view your ‘Aadhaar Card.’
How to Add RC book in DigiLocker?
Similar to the processes described above, RC can also be added to DigiLocker. Follow the steps below:
Step 1: Log in to your DigiLocker website through the app or website.
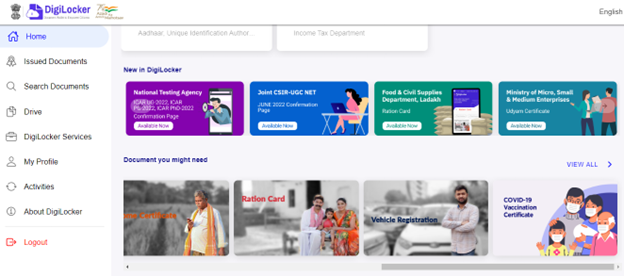
Step 2: The dashboard will appear. In the ‘Document, you might need’ section, scroll a little right and click on the box named – ‘Vehicle Registration.’
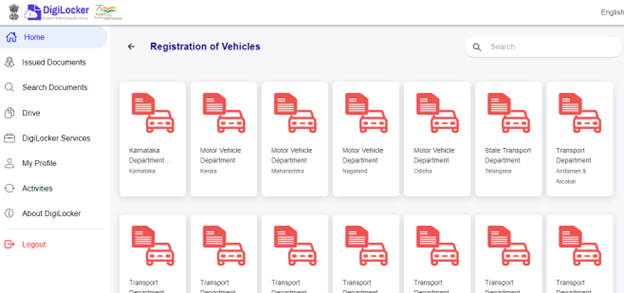
Step 3: The page ‘Registration of Vehicles’ will open. Select the concerned state where you have certified your vehicle.
Step 4: You will be directed to a new page, where you have to fill up the required information such as your name, registration number as per your Vehicle Registration Certificate (RC), and chassis number as per your RC.
Then, check the box to provide consent to DigiLocker and click on the ‘Get Document button.
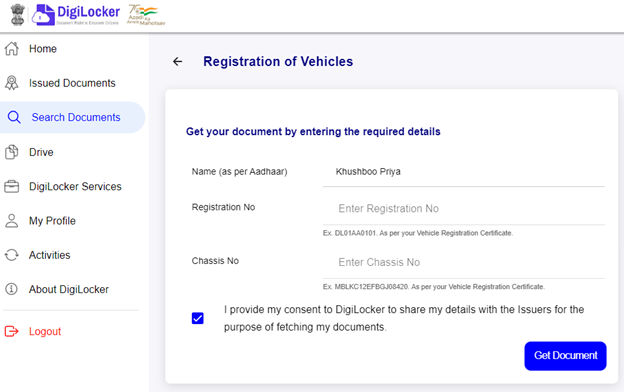
Step 5: DigiLocker will fetch your details and upload the document. You can view your RC in the ‘Issued Documents’ section of your DigiLocker account.
How to Download Documents in DigiLocker?
Downloading documents in DigiLocker becomes easier if you have already uploaded them. All you need to do is to log into your DigiLocker account and navigate to the ‘Issued Documents’ section. From there, you can download any documents you want by simply clicking on the download icon.
How to Download a Vaccination Certificate from DigiLocker?
If you are COVID 19 vaccinated, you can download your vaccination certificate from DigiLocker. Follow the steps below:
Step 1: Log in to your DigiLocker account through the website or phone.
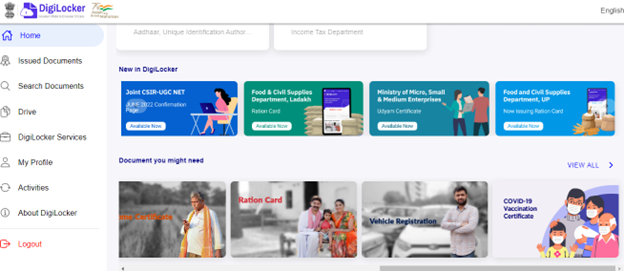
Step 2: You will be taken to the dashboard. Scroll down a little to the ‘Documents you might need section. Scroll a little right, and you will find a box displaying – ‘COVID-19 Vaccination Certificate’. Click on that.
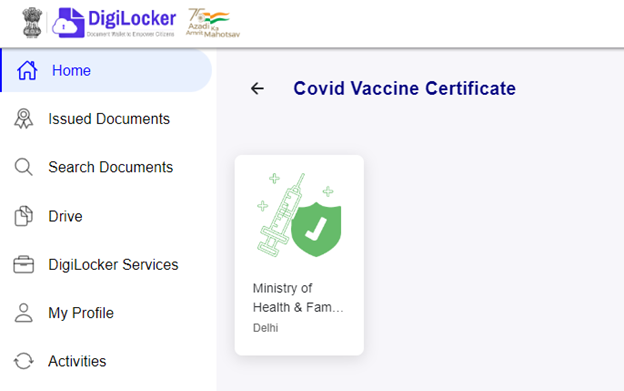
Step 3: You will be taken to a new. As you can see in the picture below, there’s another box that says — ‘Ministry of Health & Family Welfare.’ Click on it.
Step 4: An application form will open. Provide details in the mandatory fields and check the consent box.
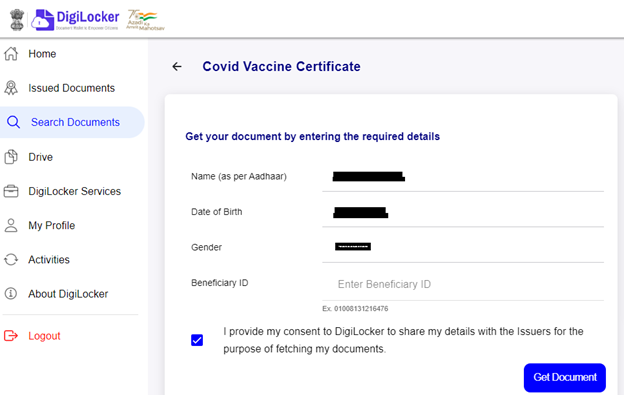
Step 5: Click on ‘Get Document’, and DigiLocker will fetch all the data and upload your vaccination certificate to your account.
Step 6: Click on the section ‘Issued Documents’ available on the left-hand side of the page.
Step 7: The Issued Documents page will open with various documents. Go to COVID-19 Vaccination Certificate and click on the download icon. The certificate will be downloaded in pdf format.
How to Download a Passport in DigiLocker?
To download the passport in DigiLocker, you have to follow the similar procedure as in the abovementioned section – ‘How to Add Passport in DigiLocker’ and then proceed with the following steps:
Step 1: Once your passport is successfully added to your DigiLocker account, you need to click on the ‘Issued Documents’ section on the dashboard.
Step 2: Find your passport and click on the download icon. Your passport will be downloaded in pdf format.
How to Download Marksheet from DigiLocker?
Whatever board you have pursued your education in, you can access and download your class 10th and 12th mark sheets from DigiLocker. All you will need handy is your roll numbers for both the board exams. Once you have them, follow the steps below:
Step 1: Open the DigiLocker portal through the website or mobile application.
Step 2: Log in to your DigiLocker account using your Mobile/Aadhaar number and enter the OTP received on your phone and email.
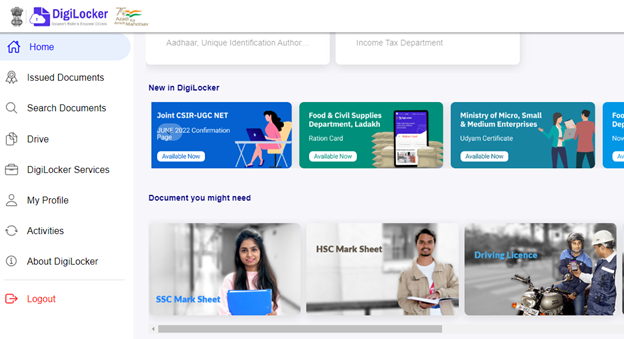
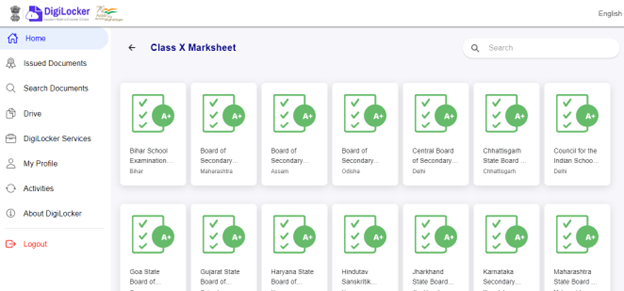
Step 3: You will be directed to the dashboard of your DigiLocker account. As you can see in the image below, there are two options for accessing the mark sheet — SSC (Class 10th) Mark Sheet and HSC (Class 12th) Marksheet. Suppose you want to access your class 10th mark sheet, then click on the ‘SSC Mark Sheet option.
Step 4: A new page will open with a variety of options to choose from. Those are different boards. Choose the one that applies to you. For instance, choose the ‘Central Board of Secondary Education option if you have studied in a CBSE board school.
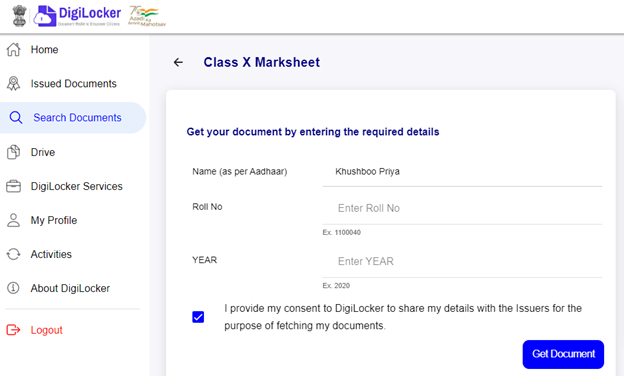
Step 5: The new will appear where you have to fill in your matriculation details, such as your roll number and the year in which you appeared for the exam. Check the consent box and click on ‘Get Document.’
Step 6: The website will automatically fetch your class 10th result data and upload the mark sheet to your Digi Account.
Step 7: Navigate to the ‘Issued Documents’ section, click on it, and you will be taken to the page where you can find all the issued documents. Click on the SSC Mark Sheet to view it, and click on the download icon. It will be downloaded in pdf format.
The same procedure should be followed to download Class XII Mark Sheet. Instead of choosing SSC Mark Sheet, click on HSC Mark Sheet and follow the same procedure as the abovementioned.
How to Download RC from DigiLocker?
Follow the similar procedure of adding your Vehicle Registration Certificate to your Digilocker account. Then, go to the ‘Issued Documents’ page, where you can view and download the RC certificate in pdf format.
How to Download PAN Card in DigiLocker?
Firstly, add your PAN Card to the DigiLocker account following the same procedure described above. Then, visit the ‘Issued Documents’ page to view your PAN Card. You can download your PAN Card from your DigiLocker account by clicking on the download icon. It will be downloaded in pdf format.
How to Download Voter ID in DigiLocker?
Since the Election Commission of India has not still partnered with DigiLocker, it cannot be downloaded from the “Issued Documents’ of your Digi account. However, if you have uploaded it on your Digi Drive, you can go to ‘Drive’ and open the ‘Documents’ option. From there, you can download your Voter ID Card.
How to Download PUC Certificate in DigiLocker?
If you followed the abovementioned steps to upload the PUC certificate to your DigiLocker account, downloading it is quite easy. Go to the ‘Issued Documents’ page on your Digi account and find the PUC certificate. Click on it to view it and tap on the download icon. The certificate will be successfully downloaded in pdf format.
How to Add a Nominee to DigiLocker?
Adding a nominee to DigiLocker is easy. Follow the steps given below:
Step 1: Open the DigiLocker application entering the security PIN.
Step 2: Navigate to the menu and tap on the nominee.
Step 3: Click on the ‘Add Nominee’ option.
Step 4: The application will ask you to enter details about the nominee. Fill it up carefully.
Step 5: The app will send OTP (One Time Password) to your registered mobile number. Click on the ‘Submit’ button.
Step 6: Once the details have been submitted successfully, the app will add the nominee successfully to the DigiLocker account.
How to Delete DigiLocker Accounts?
Once you have created an account with DigiLocker, it will stay there. It cannot be deleted or deactivated.
Note: If you create a DigiLocker account using your mobile number, your Aadhaar details won’t be linked. However, if your phone number is registered with the Aadhaar card, the DigiLocker account will automatically update your account details. Once updated, you won’t be able to delete it.
The application doesn’t have any options that allow the deactivation or deletion of the DigiLocker account. Also, the app doesn’t offer any option to delete the uploaded documents from your DigiLocker Account.
Deleting the DigiLocker Account Using Email
Although there’s no option for deleting the DigiLocker account, it may be possible if you have a valid reason. It’s not tried and tested, but you can try reaching DigiLocker support via email and wish they respond and act.
Follow the steps below to delete your DigiLocker account via email:
Step 1: Open your email account.
Step 2: Compose an email requesting the support team for account deletion and make it out to support@digitallocker[dot]gov[dot]in
Step 3: The Subject of your mail should say, “ Request for Account Deletion” or “DigiLocker Account Deletion”.
Step 4: In the body, you must provide the reason for account deletion and request to delete the account.
Note: In the mail, you must mention your DigiLocker account details and your registered mobile number. Also, let them know you will furnish any related information if required.
DOWNLOAD APP:
DigiLocker : Frequently Asked Questions (FAQs)
Is DigiLocker safe?
Yes, DigiLocker is a secure app designed with all required security measures to ensure the users’ data is protected. The application is hosted under ISO 27001 standards to protect users’ financial and personal assets information.
What is the Digi Locker app used for?
The app lets you store various documents, such as your PAN Card, Aadhaar Card, High School and College Marksheets, Driving License, Voter ID, etc., in digital forms.
What is DigiLocker ID?
DigiLocker ID is an account created in the cloud for every Aadhaar holder to let them access authentic certificates/documents, including academic mark sheets, the driving license, identity cards, address proofs, etc. in digital format from the original issuers of these certificates.
What is a DigiLocker account?
DigiLocker account is a cloud storage space that lets you store documents online.
How does DigiLocker work?
The app offers 1 GB of cloud storage to every citizen, where they can scan and store their documents digitally.
Is DigiLocker a government app?
Yes, the app is provided by the Ministry of Electronics and Information Technology (MeitY), Government of India.
Is DigiLocker certificate valid?
Yes, the certificates and documents available on DigiLocker are valid.
Why is DigiLocker not working?
If your DigiLocker isn’t working, you need to update it from the Google Play Store.
What is the security pin for DigiLocker?
The security PIN for DigiLocker is a six-digit number that candidates must enter whenever they wish to access their DigiLocker accounts.
What is DigiLocker CBSE?
It’s a security PIN created by CBSE (Central Board of Secondary Education) to allow candidates access to their accounts.